How to switch from Custom Product Tabs for WooCommerce without losing your tabs
If your store uses Custom Product Tabs for WooCommerce, you can move every product tab and saved tab to ShelfTabs in one click. It takes a few minutes, nothing in the old plugin is changed, and you can switch back at any time.
Short version: install the free ShelfTabs plugin, go to WooCommerce → ShelfTabs, click Import now, check a few product pages, then deactivate the old plugin.
Before you start
- Keep Custom Product Tabs for WooCommerce installed until the import is done. ShelfTabs reads its data.
- On a busy store, take a backup first, as you would before any plugin change. The import doesn't edit or delete the old data, but a backup is good practice.
- Large catalogs are fine. The import runs in batches of 50 products, so it won't time out.
Step 1: Install ShelfTabs
In WordPress, go to Plugins → Add New, search for ShelfTabs, then install and activate it. ShelfTabs is free and needs WooCommerce.
Step 2: Run the import
Go to WooCommerce → ShelfTabs and scroll to Import from Custom Product Tabs for WooCommerce. It shows how many products have tabs. Click Import now.
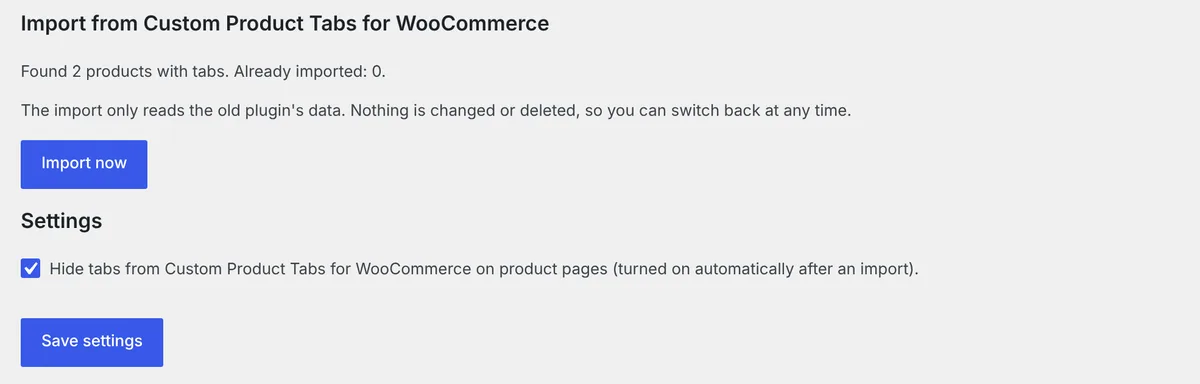
What the import does:
- Product tabs are copied to each product's ShelfTabs tabs.
- Saved tabs become ShelfTabs saved tabs. Products that used them stay linked, so editing a saved tab once still updates every product.
- Already imported products are skipped, so running it twice creates no duplicates.
- When it finishes, ShelfTabs hides the old plugin's tabs on product pages, so nothing shows twice.
Step 3: Check a few product pages
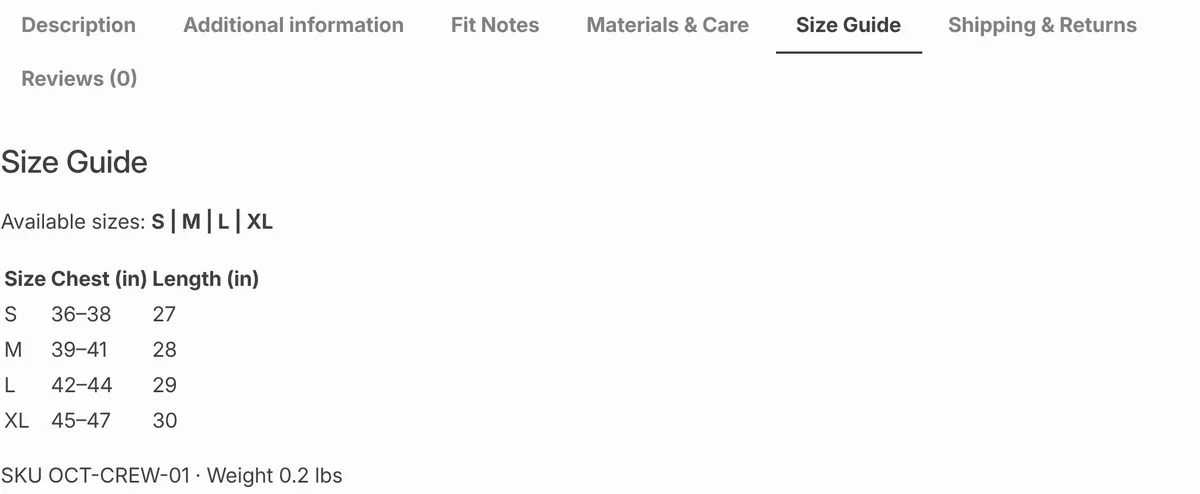
Open three or four products that had tabs and make sure each tab shows once, in the right order, with the right content.
Step 4: Deactivate the old plugin
Once you're happy, deactivate Custom Product Tabs for WooCommerce under Plugins. Your tabs now come from ShelfTabs.
Changed your mind?
Reactivate the old plugin and untick Hide tabs from Custom Product Tabs for WooCommerce on the WooCommerce → ShelfTabs page. Its data was never touched, so everything is where you left it.
Stop adding the same tab to every product
ShelfTabs Pro shows a saved tab on every product in a category automatically, and fills in each product's SKU, weight and sizes with merge tags. From $29 a year, with a 30-day money-back guarantee.
See ShelfTabs Pro